장고로 DB연동해서 데이터를 화면에 보여주자

포스트 목록을 볼 수 있도록 하기 위해서는 데이터베이스 모델 설정, 데이터베이스 마이그레이션, 그리고 뷰와 템플릿 설정이 필요합니다. 아래 단계에 따라 설정을 진행해보세요.
1. 데이터베이스 모델 설정
models.py 파일에서 Post 모델을 정의합니다.
# mysite/models.py
from django.db import models

class Post(models.Model):
    title = models.CharField(max_length=100)
    body = models.TextField()

    def __str__(self):
        return self.title
2. 데이터베이스 마이그레이션
새로운 모델을 데이터베이스에 반영하기 위해 마이그레이션을 수행합니다.
python manage.py makemigrations
python manage.py migrate
에러가 발생할 수 있습니다. 저의 경우에는 아래와 같은 오류가 발생했습니다.
➜  mysite python manage.py makemigrations
Traceback (most recent call last):
  File "manage.py", line 22, in <module>
    main()
  File "manage.py", line 18, in main
    execute_from_command_line(sys.argv)
  File "/Users/xxx/.pyenv/versions/3.7.17/lib/python3.7/site-packages/django/core/management/__init__.py", line 419, in execute_from_command_line
    utility.execute()
  File "/Users/xxx/.pyenv/versions/3.7.17/lib/python3.7/site-packages/django/core/management/__init__.py", line 413, in execute
    self.fetch_command(subcommand).run_from_argv(self.argv)
  File "/Users/xxx/.pyenv/versions/3.7.17/lib/python3.7/site-packages/django/core/management/base.py", line 354, in run_from_argv
    self.execute(*args, **cmd_options)
  File "/Users/xxx/.pyenv/versions/3.7.17/lib/python3.7/site-packages/django/core/management/base.py", line 393, in execute
    self.check()
  File "/Users/xxx/.pyenv/versions/3.7.17/lib/python3.7/site-packages/django/core/management/base.py", line 423, in check
    databases=databases,
  File "/Users/xxx/.pyenv/versions/3.7.17/lib/python3.7/site-packages/django/core/checks/registry.py", line 76, in run_checks
    new_errors = check(app_configs=app_configs, databases=databases)
  File "/Users/xxx/.pyenv/versions/3.7.17/lib/python3.7/site-packages/django/core/checks/urls.py", line 13, in check_url_config
    return check_resolver(resolver)
  File "/Users/xxx/.pyenv/versions/3.7.17/lib/python3.7/site-packages/django/core/checks/urls.py", line 23, in check_resolver
    return check_method()
  File "/Users/xxx/.pyenv/versions/3.7.17/lib/python3.7/site-packages/django/urls/resolvers.py", line 416, in check
    for pattern in self.url_patterns:
  File "/Users/xxx/.pyenv/versions/3.7.17/lib/python3.7/site-packages/django/utils/functional.py", line 48, in __get__
    res = instance.__dict__[self.name] = self.func(instance)
  File "/Users/xxx/.pyenv/versions/3.7.17/lib/python3.7/site-packages/django/urls/resolvers.py", line 602, in url_patterns
    patterns = getattr(self.urlconf_module, "urlpatterns", self.urlconf_module)
  File "/Users/xxx/.pyenv/versions/3.7.17/lib/python3.7/site-packages/django/utils/functional.py", line 48, in __get__
    res = instance.__dict__[self.name] = self.func(instance)
  File "/Users/xxx/.pyenv/versions/3.7.17/lib/python3.7/site-packages/django/urls/resolvers.py", line 595, in urlconf_module
    return import_module(self.urlconf_name)
  File "/Users/xxx/.pyenv/versions/3.7.17/lib/python3.7/importlib/__init__.py", line 127, in import_module
    return _bootstrap._gcd_import(name[level:], package, level)
  File "<frozen importlib._bootstrap>", line 1006, in _gcd_import
  File "<frozen importlib._bootstrap>", line 983, in _find_and_load
  File "<frozen importlib._bootstrap>", line 967, in _find_and_load_unlocked
  File "<frozen importlib._bootstrap>", line 677, in _load_unlocked
  File "<frozen importlib._bootstrap_external>", line 728, in exec_module
  File "<frozen importlib._bootstrap>", line 219, in _call_with_frames_removed
  File "/Users/xxx/Projects/django/mysite/mysite/urls.py", line 19, in <module>
    from . import views
  File "/Users/xxx/Projects/django/mysite/mysite/views.py", line 11, in <module>
    from .models import Post
  File "/Users/xxx/Projects/django/mysite/mysite/models.py", line 4, in <module>
    class Post(models.Model):
  File "/Users/xxx/.pyenv/versions/3.7.17/lib/python3.7/site-packages/django/db/models/base.py", line 116, in __new__
    "INSTALLED_APPS." % (module, name)
RuntimeError: Model class mysite.models.Post doesn't declare an explicit app_label and isn't in an application in INSTALLED_APPS.
대충 마지막 라인을 보니 명시적인 앱라벨이 정의되지 않은 것 같습니다.
# mysite/settings.py
INSTALLED_APPS = [
    'django.contrib.admin',
    'django.contrib.auth',
    'django.contrib.contenttypes',
    'django.contrib.sessions',
    'django.contrib.messages',
    'django.contrib.staticfiles',
    'mysite', # 요거 추가
]
다시 명령어를 실행해봅니다.
➜  mysite python manage.py makemigrations
No changes detected
mysite python manage.py migrate
Operations to perform:
  Apply all migrations: admin, auth, contenttypes, sessions
Running migrations:
  Applying contenttypes.0001_initial... OK
  Applying auth.0001_initial... OK
  Applying admin.0001_initial... OK
  Applying admin.0002_logentry_remove_auto_add... OK
  Applying admin.0003_logentry_add_action_flag_choices... OK
  Applying contenttypes.0002_remove_content_type_name... OK
  Applying auth.0002_alter_permission_name_max_length... OK
  Applying auth.0003_alter_user_email_max_length... OK
  Applying auth.0004_alter_user_username_opts... OK
  Applying auth.0005_alter_user_last_login_null... OK
  Applying auth.0006_require_contenttypes_0002... OK
  Applying auth.0007_alter_validators_add_error_messages... OK
  Applying auth.0008_alter_user_username_max_length... OK
  Applying auth.0009_alter_user_last_name_max_length... OK
  Applying auth.0010_alter_group_name_max_length... OK
  Applying auth.0011_update_proxy_permissions... OK
  Applying auth.0012_alter_user_first_name_max_length... OK
  Applying sessions.0001_initial... OK
3. 관리자 인터페이스 설정 (선택 사항)
Django 관리자 인터페이스에서 데이터를 관리할 수 있도록 admin.py 파일을 설정합니다.
# mysite/admin.py
from django.contrib import admin
from .models import Post

admin.site.register(Post)
관리자 계정을 생성합니다.
python manage.py createsuperuser
아래와 같이 진행됩니다.
➜  mysite python manage.py createsuperuser
Username (leave blank to use 'xxx'): admin
Email address: xxx@gmail.com
Password:
Password (again):
Superuser created successfully.
4. 포스트 목록 보기
views.py 파일에서 post_list 뷰를 정의합니다.
# mysite/views.py
from django.shortcuts import render
from .models import Post

def post_list(request):
    posts = Post.objects.all()
    return render(request, 'post_list.html', {'posts': posts})
urls.py 파일을 수정하여 post_list 뷰를 연결합니다.
# mysite/urls.py
from django.contrib import admin
from django.urls import path
from . import views

urlpatterns = [
    path('admin/', admin.site.urls),
    path('posts/', views.post_list, name='post_list'),
    path('search/', views.search_results, name='search_results'),  # 검색 뷰 추가
]
5. 템플릿 파일 생성
templates 폴더에 post_list.html 파일을 생성하고 다음 내용을 추가합니다.
<!-- templates/post_list.html -->
<html>
<head>
    <title>Post List</title>
</head>
<body>
    <h1>Post List</h1>
    <ul>
        {% for post in posts %}
        <li>
            <h2>{{ post.title }}</h2>
            <p>{{ post.body }}</p>
        </li>
        {% endfor %}
    </ul>
</body>
</html>
검색 폼을 위한 search_form.html 파일도 생성합니다.
<!-- templates/search_form.html -->
<form method="GET" action="{% url 'search_results' %}">
    <input type="text" name="q" placeholder="Search...">
    <button type="submit">Search</button>
</form>
검색 결과를 보여줄 search_results.html 파일을 생성합니다.
<!-- templates/search_results.html -->
<html>
<head>
    <title>Search Results</title>
</head>
<body>
    <h1>Search Results</h1>
    <ul>
        {% for post in results %}
        <li>
            <h2>{{ post.title }}</h2>
            <p>{{ post.body }}</p>
        </li>
        {% endfor %}
    </ul>
</body>
</html>
6. 검색 뷰 정의
views.py 파일에서 검색 결과를 처리하는 search_results 뷰를 정의합니다.
# mysite/views.py
from django.db.models import Q
from .models import Post

def search_results(request):
    query = request.GET.get('q')
    results = Post.objects.filter(Q(title__icontains=query) | Q(body__icontains=query))
    return render(request, 'search_results.html', {'results': results})
7. 서버 실행
이제 모든 설정이 완료되었습니다. 서버를 실행하여 포스트 목록과 검색 기능을 확인할 수 있습니다.
python manage.py runserver
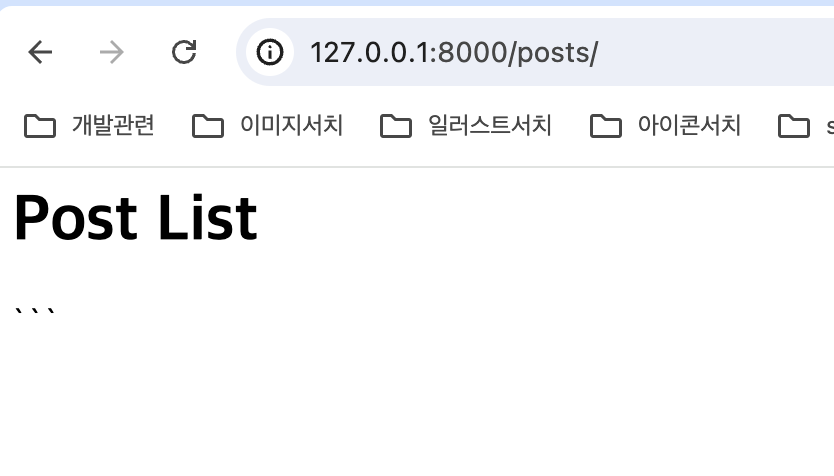
브라우저에서 http://localhost:8000/posts/에 접속하여 포스트 목록을 확인하고, http://localhost:8000/search/에 접속하여 검색 기능을 테스트해보세요.
테이블이 없다고 에러가 나올수 있다. 그럴땐 아래 파일을 생성하고 명시적으로 마이그레이션을 한번더 해본다.
# mysite/apps.py
from django.apps import AppConfig

class MysiteConfig(AppConfig):
    name = 'mysite'
그리고 다시 마이그레이션을 수행한다.
➜  mysite python manage.py makemigrations mysite
Migrations for 'mysite':
  mysite/migrations/0001_initial.py
    - Create model Post
➜  mysite python manage.py migrate
Operations to perform:
  Apply all migrations: admin, auth, contenttypes, mysite, sessions
Running migrations:
  Applying mysite.0001_initial... OK
그리고 다시 사이트에 접속하면,

끗!
